
Peanut Butter Fudge Recipe: Creamy, Rich, and Irresistible
Every family has a special recipe that brings comfort and joy. For me, this easy peanut butter fudge is a treasured secret. It promises sweet memories with every bite.
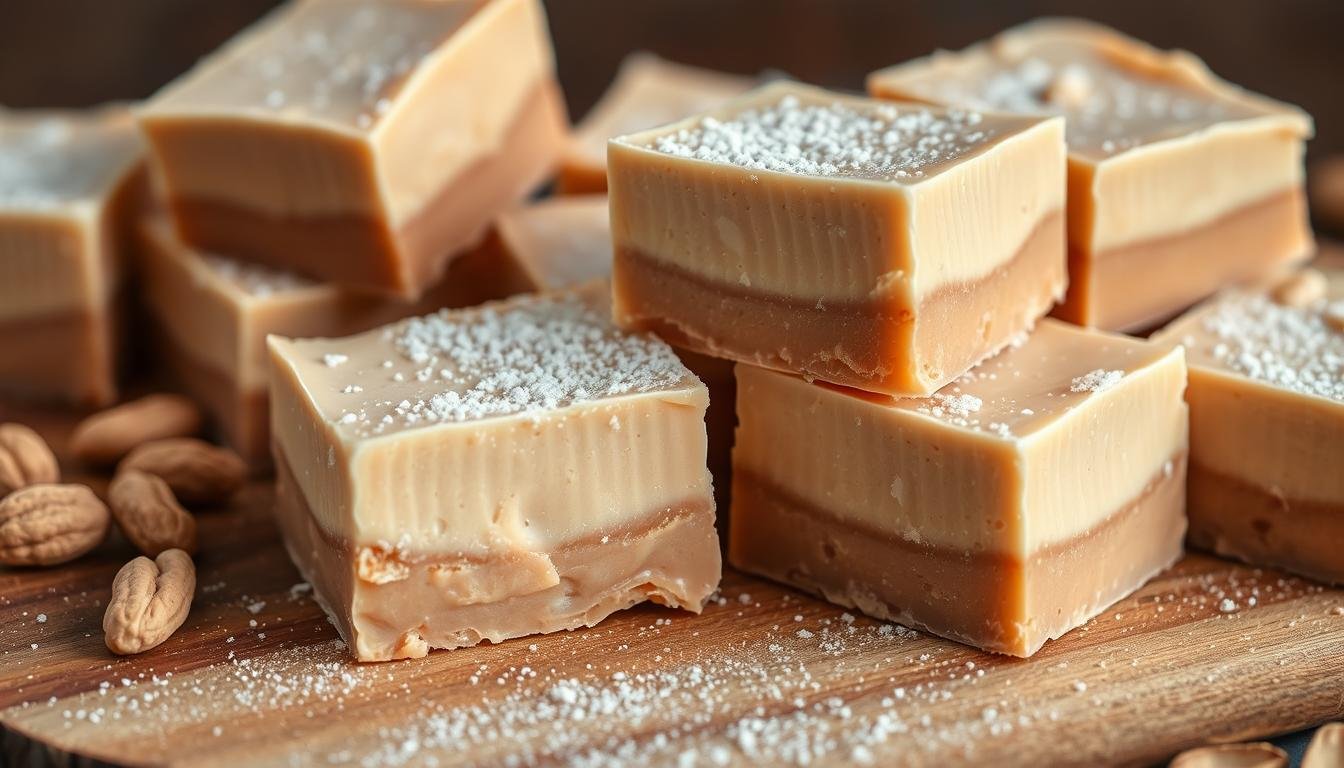
Imagine a dessert that melts in your mouth, offering a deep peanut butter flavor. This fudge recipe is more than a treat. It’s an experience that connects generations and creates lasting memories.
Whether you’re new to baking or a seasoned dessert lover, this simple recipe is for you. With just a few ingredients and minimal prep, you can make a rich, creamy fudge. It will impress your family and friends.
Get ready to find the ultimate easy peanut butter fudge. It turns basic ingredients into a spectacular dessert everyone will love. Your kitchen is about to become the sweetest spot in the house!
Table of Contents
Why This Peanut Butter Fudge Will Become Your Go-To Recipe
Finding the perfect peanut butter fudge can change your dessert game. This recipe is special because it’s easy to make and tastes amazing. It’s a hit with home bakers and anyone who loves sweet treats.

Perfect Texture and Consistency
The secret to this fudge’s greatness is its texture. Sweetened condensed milk makes it smooth and creamy. This mix of peanut butter and condensed milk creates a rich, velvety treat that’s hard to resist.
- Ultra-smooth texture
- Rich, creamy mouthfeel
- Perfectly balanced sweetness
Foolproof Method for Beginners
If you’re new to candy making, this recipe is perfect for you. It’s easy to follow and needs just a few ingredients. You’ll get better with each batch you make.
| Skill Level | Difficulty | Time Required |
|---|---|---|
| Beginner | Easy | 30 minutes |
Versatile Gift-Giving Option
Adding marshmallow creme to your peanut butter fudge makes it even more special. It’s a great homemade gift that will wow your friends and family. You can wrap it in decorative boxes or wrap it individually for a thoughtful gift.
Pro tip: Homemade fudge always beats store-bought!
Essential Ingredients for Perfect Fudge

To make the perfect peanut butter fudge, you need the right ingredients. Each one is important for the fudge’s creamy texture. This texture makes the dessert so tempting.
Choosing the Right Peanut Butter Type
Not all peanut butter is good for fudge. Creamy peanut butter is the best choice. Stay away from natural peanut butter because it can make the fudge uneven.
- Opt for commercial creamy peanut butter brands
- Avoid oil-separated natural peanut butter
- Look for smooth, consistent texture
Understanding Sweetened Condensed Milk
Sweetened condensed milk is key to your fudge. It’s thick and sweet, making the fudge smooth and delicious.
Additional Flavor Enhancers
Make your fudge even better with extra flavors. A little salt or vanilla extract can make it special.
- Vanilla extract – adds depth
- Sea salt – balances sweetness
- Powdered sugar – for extra smoothness
Pro tip: Always use fresh, high-quality ingredients to ensure the best possible flavor in your peanut butter fudge.
Kitchen Tools and Equipment Needed
Making delicious, easy peanut butter fudge is easy. You don’t need a fancy kitchen. Most people already have what they need at home.
Here are the key tools you’ll need to make your easy peanut butter fudge:
- Heavy-bottomed saucepan – ensures even heating and prevents burning
- Measuring cups and spoons for precise ingredient amounts
- Sturdy wooden or silicone spatula for mixing
- 8×8-inch baking dish or square pan
- Parchment paper for easy fudge removal
Optional tools that can make your fudge-making better include:
- Candy thermometer for precise temperature control
- Kitchen scale for accurate ingredient measurements
- Offset spatula for smooth fudge surface
The best part about making easy peanut butter fudge is that you probably already have most of these tools. With just a few basic items, you can make creamy, delicious fudge quickly!
Step-by-Step Preparation Method
Making the perfect peanut butter fudge needs precision and care. This guide will help you through each step. You’ll learn how to make a creamy and irresistible treat.
Before starting, make sure your workspace is organized. This makes making peanut butter fudge smooth and fun. Being organized is crucial for a perfect fudge every time.
Preparing Your Workspace
- Gather all ingredients before starting
- Line an 8×8-inch baking pan with parchment paper
- Measure ingredients precisely
- Have all utensils clean and ready
Melting and Mixing Process
The secret to smooth peanut butter fudge is careful melting and mixing. Use a double boiler or microwave to gently combine ingredients.
| Ingredient | Melting Method | Mixing Technique |
|---|---|---|
| Peanut Butter | Low heat | Smooth stirring |
| Condensed Milk | Gentle warming | Gradual incorporation |
Setting and Cooling Techniques
After mixing, pour the fudge into the prepared pan. Spread evenly and tap to remove air bubbles.
- Refrigerate for 2-3 hours
- Allow fudge to set completely
- Cut into square pieces
- Store in an airtight container
Your easy peanut butter fudge is now ready to enjoy! The key is patience during cooling for that perfect, creamy texture.
Tips for Achieving Smooth and Creamy Texture
Making perfect peanut butter fudge with condensed milk needs precision and skill. You must master a few key steps for a silky-smooth result every time.
Temperature control is key when making peanut butter fudge. The right heat prevents graininess and gives a luxurious, creamy texture. Let’s look at some professional techniques to improve your fudge-making skills.
- Use a candy thermometer to monitor precise temperatures
- Stir continuously during the cooking process
- Remove from heat immediately when reaching the correct temperature
- Allow the peanut butter fudge to cool naturally without excessive manipulation
When working with condensed milk, gentle heating is essential. Fast or high-temperature cooking can lead to a grainy texture. Slow, consistent stirring helps create a smooth mixture that sets perfectly.
| Technique | Impact on Texture |
|---|---|
| Gentle Heating | Prevents Sugar Crystallization |
| Continuous Stirring | Ensures Even Consistency |
| Proper Cooling | Maintains Smooth Texture |
Professional bakers suggest minimal handling once your peanut butter fudge starts to set. Overworking the mixture can introduce unwanted air and disrupt the smooth texture you’ve carefully created.
The secret to perfect fudge is patience and precision.
By following these expert tips, you’ll turn your homemade peanut butter fudge into a creamy, melt-in-your-mouth delicacy. It will look and taste professionally crafted.
Creative Variations and Add-ins
Make your peanut butter fudge stand out by trying new flavors and mix-ins. These ideas will turn your fudge into a masterpiece that wows everyone.
Chocolate Swirl Options
Add chocolate swirls to your fudge for a beautiful look and taste. You can:
- Drizzle melted dark chocolate on top
- Mix in chocolate ribbons
- Make marbled patterns with a knife
Nutty Additions
Adding nuts can make your fudge better. Try these nuts with peanut butter:
- Chopped roasted peanuts for crunch
- Toasted almonds for a fancy touch
- Candied pecans for a sweet twist
Holiday Variations
Make your fudge special for holidays with these ideas:
- Christmas: Add crushed candy canes
- Halloween: Use orange food coloring and candy corn
- Autumn: Mix in pumpkin spice and orange zest
“Creativity is the secret ingredient that turns good fudge into an unforgettable treat!” – Baking Enthusiast
Storage and Shelf Life Guidelines
Keeping your homemade peanut butter fudge fresh is key. The right storage can keep it creamy and flavorful for weeks.
Here are the must-know tips for storing your fudge:
- Room Temperature Storage: Keep fudge in an airtight container
- Separate layers with parchment paper to prevent sticking
- Store away from direct sunlight and heat sources
Shelf life varies depending on your storage method:
| Storage Method | Duration |
|---|---|
| Room Temperature | 2-3 weeks |
| Refrigerator | 3-4 weeks |
| Freezer | Up to 3 months |
To store fudge for a long time, wrap each piece in plastic wrap. Then, put them in a freezer-safe container. This keeps the fudge from getting freezer burn and keeps it soft.
Look out for signs of spoilage like bad smells, color changes, or getting hard. If you’re unsure, it’s safer to throw it away to avoid food safety issues.
Troubleshooting Common Fudge Problems
Making perfect easy peanut butter fudge can be tricky. Even experienced bakers face challenges. But most issues have simple fixes for smooth, creamy fudge every time.
When you make easy peanut butter fudge, you might hit a few common problems. These can mess with the texture and consistency of your dessert.
Texture Troubles and Quick Fixes
- Grainy Texture: Often caused by sugar crystallization during cooking
- Solution: Stir less and use a candy thermometer for precise temperature control
- Ensure you’re using fresh, high-quality peanut butter
Setting and Cooling Challenges
Your easy peanut butter fudge might have trouble setting right. This can be due to a few reasons:
- Incorrect sugar-to-liquid ratio
- Insufficient cooking time
- Room temperature variations
Temperature Control Secrets
“Precision is key when creating the perfect fudge texture.” – Pastry Chef Recommendation
Keeping the right temperature is key to your peanut butter fudge. Here are some pro tips:
- Use a reliable candy thermometer
- Cook to exactly 234-238°F (soft-ball stage)
- Cool fudge slowly at room temperature
- Avoid refrigerating immediately after cooking
With these tips, you’ll make delicious, easy peanut butter fudge. It will impress your family and friends.
Nutritional Information and Serving Sizes
Enjoying peanut butter fudge with powdered sugar can be fun if you know what you’re eating. A small piece, about 1-2 inches square, is perfect. It lets you enjoy the taste without eating too much.
Here’s what you get in a standard serving of peanut butter fudge:
- Calories: 100-120 per small piece
- Total Fat: 6-8 grams
- Protein: 2-3 grams
- Carbohydrates: 10-12 grams
Peanut butter adds some good stuff to this sweet treat. It has protein and healthy fats, unlike regular sugar fudges. Powdered sugar can change the nutritional values a bit, making it slightly less calorie-dense.
If you’re watching your diet, here are some tips:
- Stick to 1-2 small pieces
- Eat lighter meals
- Share with others
- See it as an occasional treat
Even though peanut butter fudge isn’t healthy, it can fit into a balanced diet. Just remember to eat it in moderation and enjoy its rich taste.
Gift-Wrapping and Presentation Ideas
Turning your homemade peanut butter fudge into a beautiful gift is all about creativity and presentation. The right packaging can make your treat stand out. It turns a simple dessert into a memorable gift that brings joy to the recipient.
When you’re getting ready to gift your peanut butter fudge, think about these packaging ideas:
- Clear cellophane bags with decorative ribbons
- Vintage-style tin containers
- Personalized kraft paper boxes
- Mason jars with custom labels
Make your gift even more special by cutting your fudge into unique shapes. Use cookie cutters for fun shapes or cut into squares for a classic look.
Adding a personal touch makes your gift even more meaningful. Consider these ideas:
- Handwritten recipe cards
- Custom ingredient labels
- Seasonal themed packaging
- Ribbon matching the recipient’s favorite color
To keep your fudge safe, wrap each piece in wax paper. Then, put them in your chosen container. This keeps them from sticking and keeps their texture perfect.
“A beautifully packaged homemade treat speaks volumes about your care and creativity.”
Conclusion
Making the perfect easy peanut butter fudge is more than just cooking. It’s about creating special memories in your kitchen. This simple recipe turns basic ingredients into a rich, creamy treat that will wow your family and friends. With a little effort, you can make amazing peanut butter fudge that’s as good as store-bought.
Your homemade easy peanut butter fudge opens up a world of possibilities. It’s perfect for a holiday dessert, a unique gift, or a sweet treat. You can add chocolate swirls or try different nut toppings to make it your own.
Start your fudge-making journey today and become your own pastry chef. The skills you learn will help you make treats that everyone will love. Remember, the more you practice, the better your fudge will get.
Your kitchen is ready to turn simple ingredients into an amazing dessert. Dive in, have fun, and enjoy the sweet rewards of your creativity.
FAQ
How long does peanut butter fudge typically last?
Can I use natural peanut butter in this recipe?
Why did my peanut butter fudge turn out grainy?
Can I make this fudge without condensed milk?
How do I cut peanut butter fudge neatly?
Is peanut butter fudge gluten-free?
Can I add other flavors to my peanut butter fudge?
How can I make my fudge less sweet?
Have you tried our recipes?
There are no reviews yet. Be the first one to write one.